A telescope is best judged after using it for a year or more. Surely a telescope cannot be judged by specifications alone: too many factors go into a telescope's success. And that initial night is just that, the initial night: extrapolation from one night is dangerous.
How has the telescope performed in its first year and a half? I rate telescopes by the observations made with them.
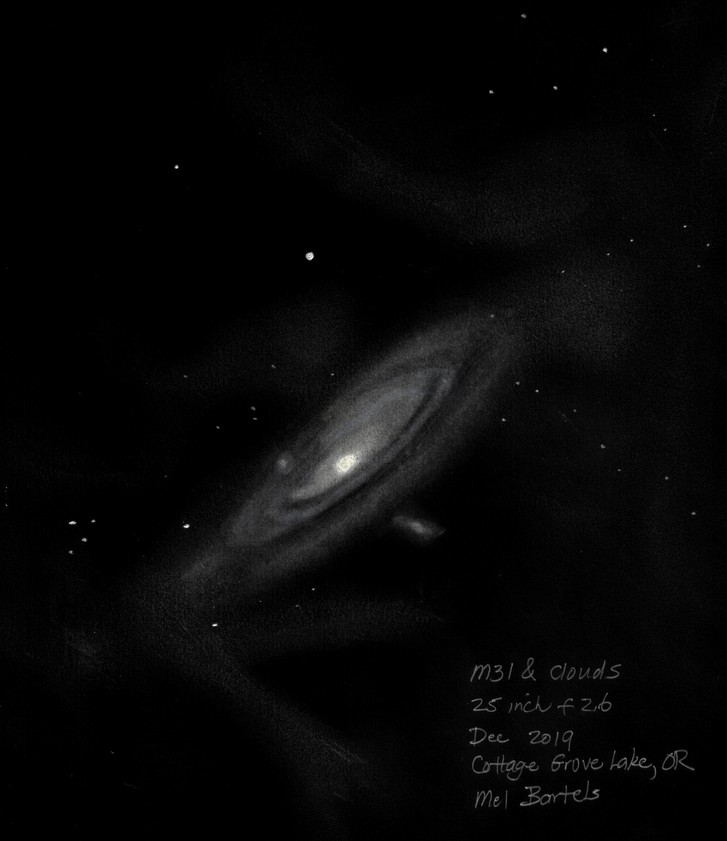
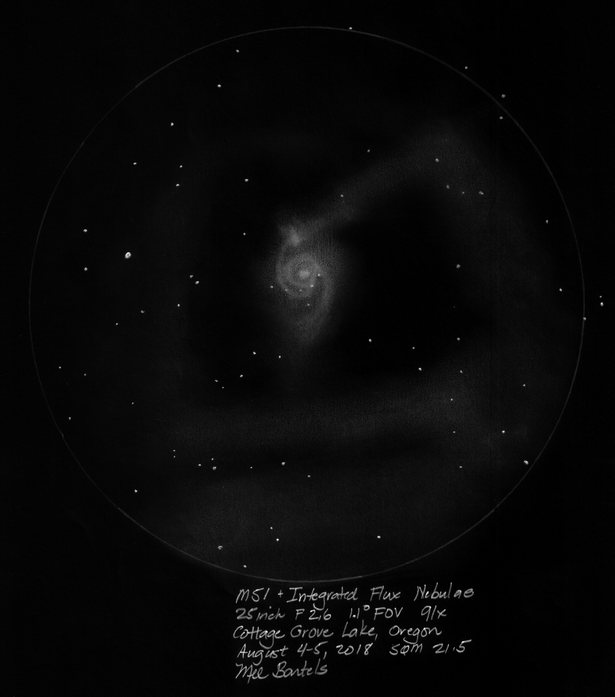
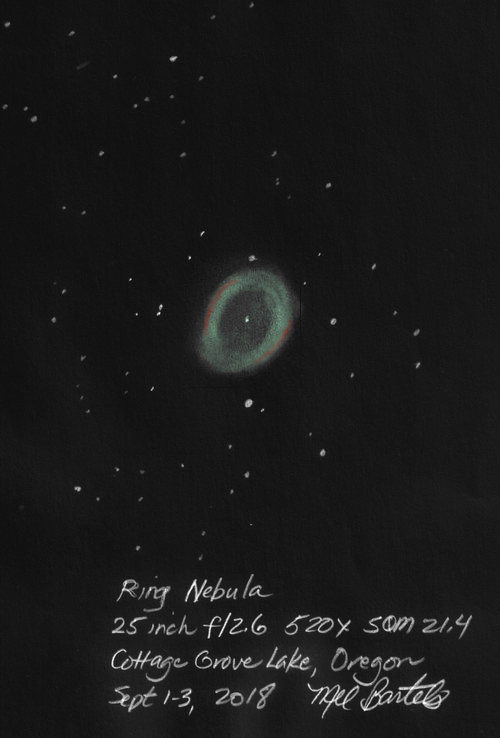
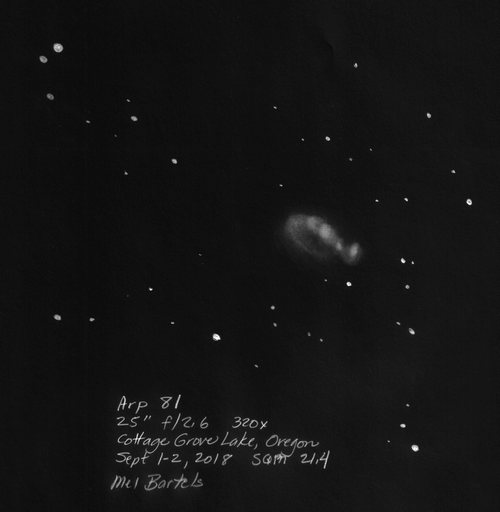
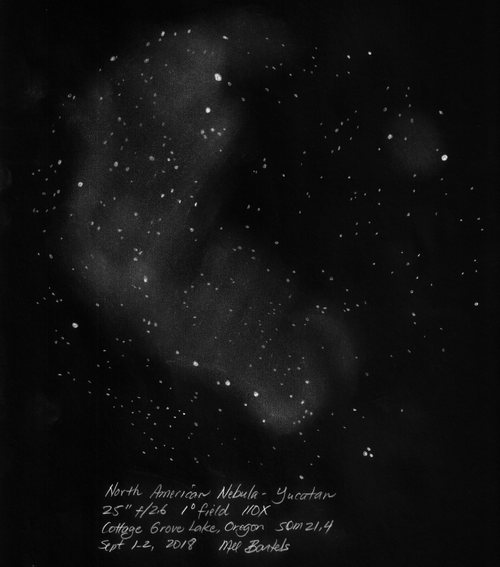
On the plus side, the telescope aimed at zenith with its feet-on-the-ground observing has led to many wonderful views and sketches. See sketches below and my drawings. In particular, I am able to see more detail in galactic cirrus or Integrated Flux Nebulae. See my drawing of M51 and my drawing of the western edge of the Andromeda Galaxy area. See my results at my webpage, Herschel's Ghosts. I've shown a number of people color in the Ring Nebula. That the tube assembly weighs 75 pounds [29kg] means quick setup from the garage to the driveway and excellent portability for those times when I setup at a darker site like the Oregon Star Party.
The third axis is really nice when observing near zenith, which I often do. No longer do I have to wait for the object to clear overhead. Unexpectedly, the alt-alt motion is more natural when the scope is pointed upward and the friction of movement better matched; no longer do I have to firmly grab the upper end to twist it around. And I use the 3rd axis to lower the eyepiece height for shorter people too.
On the negative side, the azimuth bearing becomes too stiff when the upwards facing Formica gets a lot of dust kicked on it. I've changed two of the four Teflon pads to ball bearings. The azimuth slides wonderfully now.
My greatest disappointment was at the recent Oregon Star Party where the mirror box was strongly heated in the hot summer sun causing bloated star images for a considerable period of time in the evening. The mirror's thinness exacerbates sensitivity to temperature change. I am also experiencing this issue in the winter when I take the telescope from the shop to the outside cold air on short notice.
Experimenting with three configurations: sealing the backside of the mirror box, allowing passive cool night air flow or blowing in slightly heated air, I've determined that the sealed backside gives the best views.
Cool night air in contact with the ultra-thin mirror's backside causes the backside to contract, pulling back the mirror's edge, resulting in undercorrection. This is quite surprising and different from a thick mirror, where the cooler temperature diffuses more slowly through the glass. My smaller meniscus mirrors do not suffer from this - they act much more like traditionally thick mirrors.
With the backside central vent plugged, the scope is ready to observe within moments of setting up. This is consistent with the time honored John Dobson standard of completely insulating the mirror in a closed mirror cell. To test this hypothesis, I blew in warmed air. This made the thin meniscus mirror look overcorrected. A potential alternative is the 'all-in' approach of Ed's 'Elvira' 24 inch where the mirror is thoroughly bathed in filtered air at the cooler ambient temperature.
Focusing at F2.6 is not an issue. What is an issue though is placing my eye exactly face on to the eyepiece, perfectly centered, and at the correct distance from the eyepiece eye lens. Failing to get this perfectly correct results in flaring star images at low powers. I find placing my eye easier with my F2.7, F2.8 and F3.0 telescopes. Also, eyepieces surprise me with varying amounts of spherical aberration at F2.6. This can be fixed by adjusting the coma corrector's tunable top setting with little noticeable coma degradation. In fact, I've found this a great method for making spherical aberration adjustments to the overall optical system. Unfortunately, the low power Ethos eyepieces are very slightly undercorrected with the tunable top squeezed down all the way. So there is no way to fix the undercorrection when the mirror is cooling.
The mirror cell is also a little touchy. If I point the scope at the horizon the mirror can slide forward a tiny fraction of an inch, causing the edge to hang up when the scope is moved upward, resulting in astigmatism. I clear the issue by pointing the scope just past vertical, releasing the tension between the mirror and the cell's edge supports.
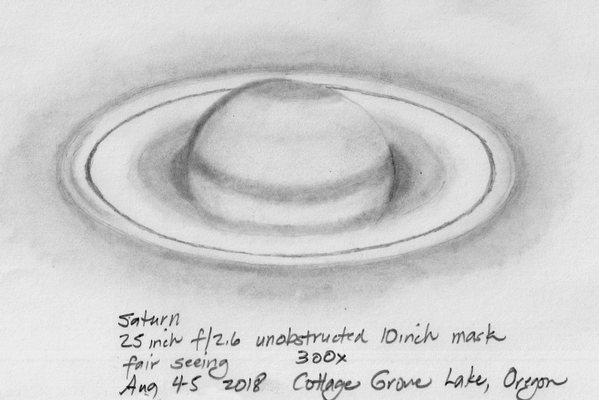
Finally, the telescope's focal length is but 65 inches [165cm]. Magnification is constrained. The maximum power I can go to is 520x. There are times when I wish I could go higher but this is the compromise that I make for feet-on-the-ground observing. In some ways, this scope is a 12.5 inch F5 whose mirror has been squeezed out to 25 inches without changing the focal length. Nonetheless, check out my sketches further below made at 520x with beautiful little specs of light for the fainter stars.
Overall I love this scope. The degree wide low power views are astonishing and the high power views are the same as in my old 24 inch F5.5 that I used for many years. I look forward to using it every clear night. And with its success I am moving onto larger meniscus mirror projects.
"The invention of the telescope is to me the most beautiful ever made. Familiarity both in making and in using has only increased my admiration." - Andrew Ainslie Common, 1900
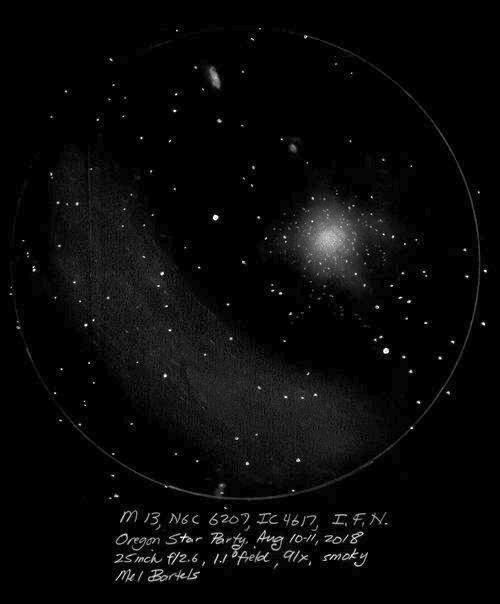
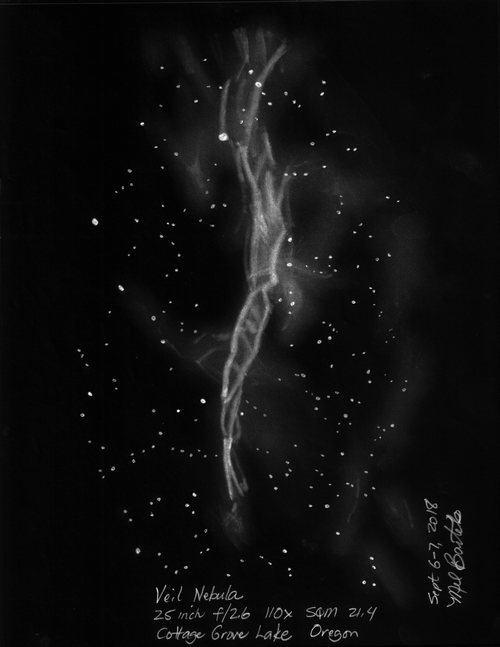
This scope is pushing boundaries: 75 pounds [34kg], meniscus mirror of f2.6 focal ratio, new 3 axis mounting – will all my effort pay off or be for naught? Here are initial sketches.
Color in the Ring Nebula seen by a number of observers and the extended very faint outer ring at highest magnification
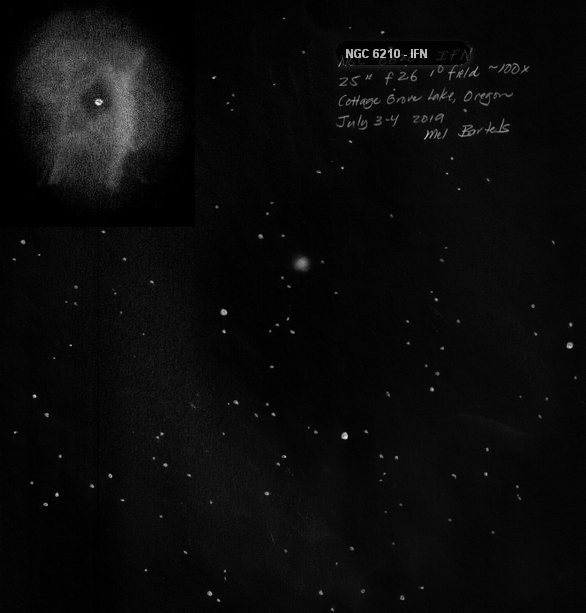
NGC 6210 IFN at lowest magnification; inserted sketch shows fine planetary detail at highest magnification
Features
25 inch [0.64m] F2.6 mirror half inch thick
1.1 degree high etendue Richest Field of view
No-ladder eyepiece height at zenith
Weighs 75 pounds [34 kg]
New 3-axis alt-az-alt mount
Fits through narrow RV doors
How revolutionary?
Fifty years ago almost to the date John Dobson made his 24 inch F6.5 mirror that became the keystone of the Dobsonian revolution. My mirror differs little. Here is a comparison:
Diameter: both mirrors are 25 inches diameter; John's was stopped down to 23.5 inches to hide a rolled edge.
Center thickness: my mirror is 5/8 inch while John's was 1/2 inch, a little thinner but not by much.
Edge thickness: my mirror is 9/16 inch which John's was 3/4 inch, a little thicker but not by much.
Glass shape: mine is meniscus or constant thickness with a curved backside while John's had a flat backside.
Both mirrors were made from plate glass.
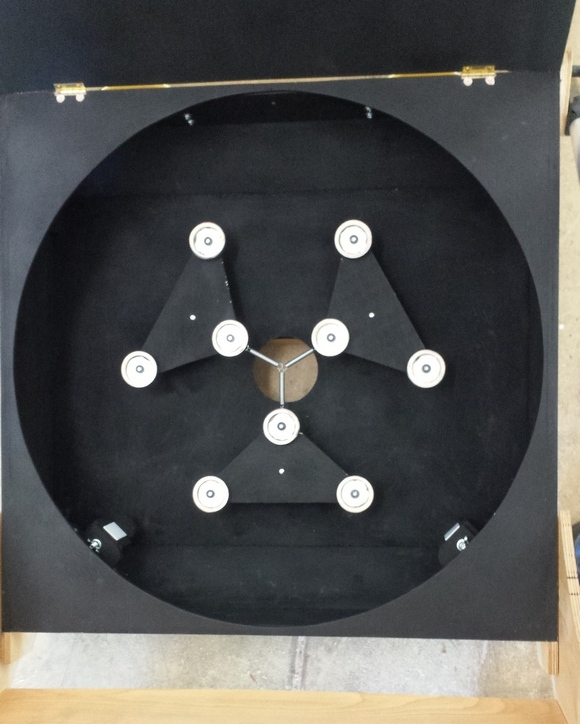
Back support system: John used an 18 point support while mine uses nine compliant rings designed to blunt the bending and shearing that occur at the support points, much like an 18 point support uses six triangles.
Lateral support is quite different: mine uses two points at 90 degree separation while John used a sling.
The broad goal is the same, namely to explore the universe.
I slumped my mirror to obtain the front curve while John ground his with carbo grit.
I used a machine to polish my mirror while John used his muscles to polish by hand.
My mirror favors wide fields, John's was more suited to higher magnifications.
Mine features on the ground observing often sitting in a chair while John's required a tall orchard latter.
The mirror that really turned my head and got my attention was David Davis' 16 inch x 1/4 inch thick slumped F3. The mirror was supported on a bed of compliant 1/4 inch diameter heads that looked like marshmallows arranged in a grid. The regular figure with complete absence of astigmatism was astonishing.
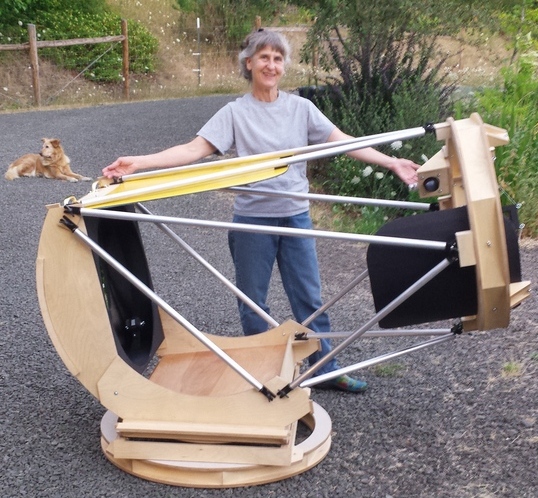
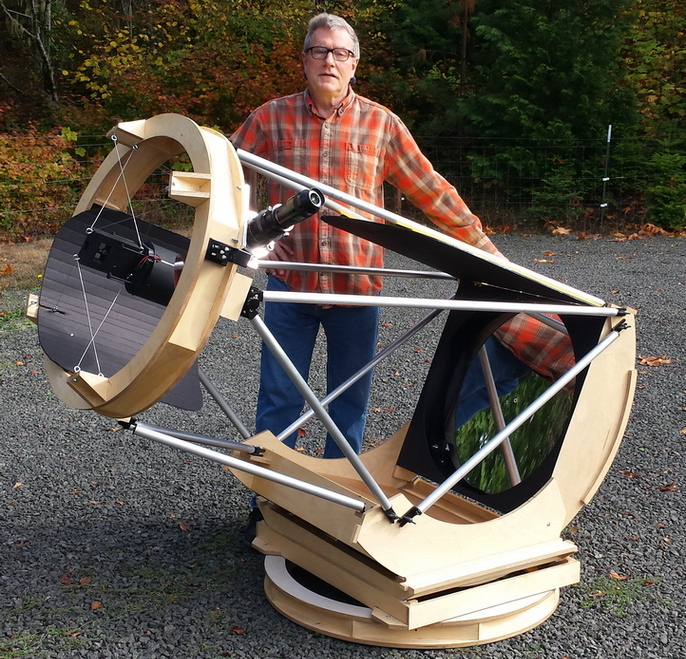
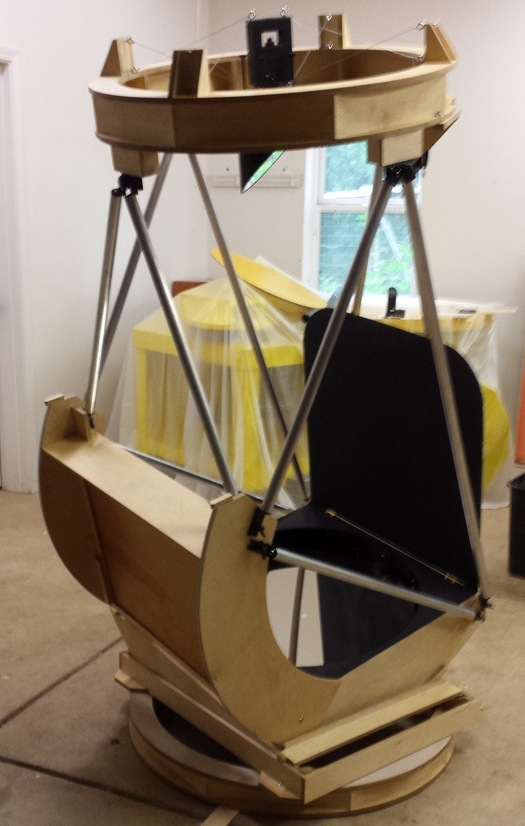
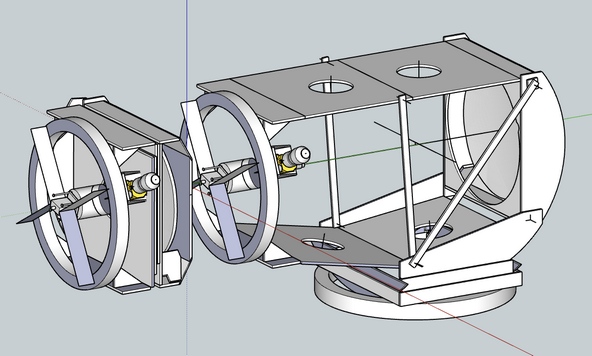
My new 3-axis alt-az-alt mount
I have invented a new three axis mount designed to solve Dobson's Hole**, the cone of trouble when moving a Dobsonian telescope near the zenith. With my new three axis mount, the scope's motions at all elevations feels natural. When the scope is pointed closer to the horizon, the well-known altazimuth's altitude and azimuth motions dominate. When pointed closer to the zenith, a new motion takes over for the increasingly awkward azimuth motion: a to and fro motion at right angles to the up and down altitude. Call this a second altitude motion, creating an alt-az-alt mount.
The friction of the movements in the three axis is set so that the alt-az motion dominates when pointed more horizontal and the alt-alt motion dominates when pointed more vertical. The angle where the motions match is about 60 degrees up in elevation. At this elevation, the force to move in azimuth has doubled. As the scope is pointed more upward the azimuth's friction of movement increases further. For ordinary alt-az telescopes moving in azimuth near the zenith, the only recourse is to twist the upper end with two hands. With the alt-az-alt mount, the scope near the zenith naturally switches over to alt-alt movement since the alt-alt friction is much less than the increased azimuth friction near the zenith.
The alt-az-alt mount can be used to adjust the eyepiece angle useful for equatorial tables. This is such an improvement that I am retrofitting all my telescopes.
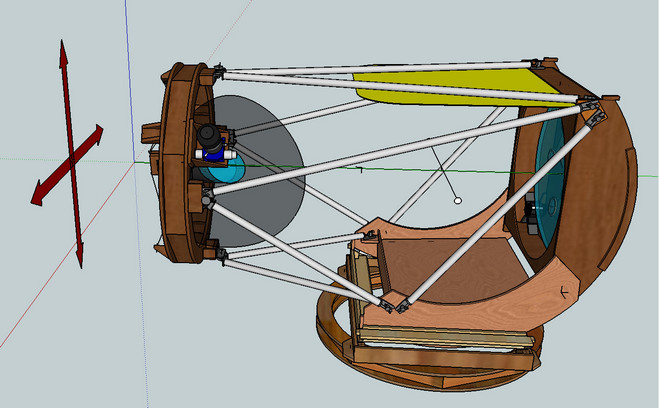
In this image you can see that the four telescope directions correspond to the altitude and azimuth axes when the telescope is pointed horizontally.
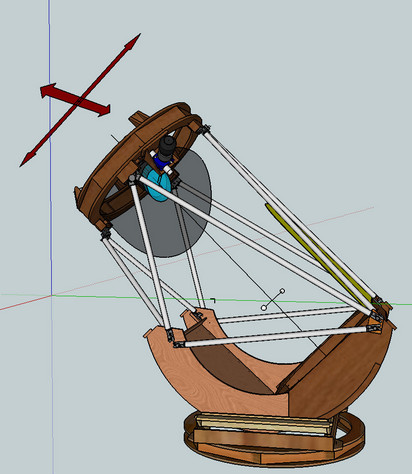
Even at 45 degrees elevation the four telescope directions still largely match up with the altitude and azimuth axes.
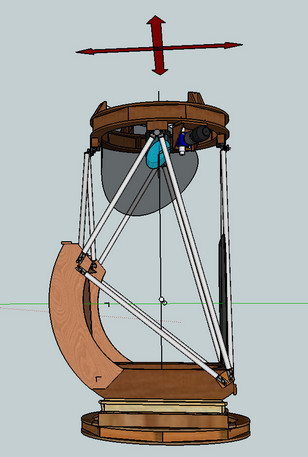
Aiming vertically it's clear the azimuth axis is doing us no good; that we need a new altitude-altitude motion.
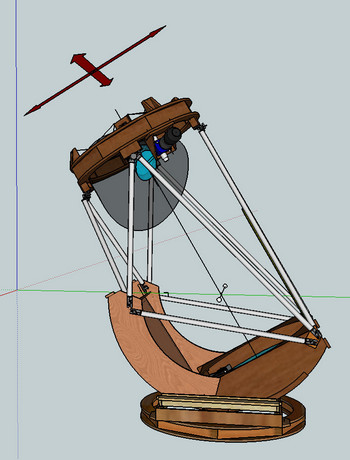
The transition zone seems to be at 60 degrees elevation where the four telescope directions match somewhat with the altitude-azimuth and somewhat with the new altitude-altitude axes both in motion and friction.
I devised a simple double flex rocker where the second rocker sits on top of the first rocker at 90 degree angle. I limited the motion to 15 degrees or +- 7.5 degrees. In the field this is more than enough motion to push through the zenith. I also took pains to extend the traditional altitude motion 7.5 degrees past zenith, giving me a pure alt-alt motion within 7.5 degrees of zenith.
Existing scopes can be retrofitted by adding a flex rocker at 90 degrees to the altitude motion along with a base ring.
** Rather unfair to call this Dobson's Hole since John hardly wanted the telescope he invented to be called the Dobsonian.
High etendue field of view
Besides the no-ladder eyepiece height and lightweight 75 pound tube assembly, I built the scope for lowest-power widest-angle field of view, taking advantage of 100 degree eyepieces. With this scope I achieve nearly a field of 1 deg^2 in area; with F4 scopes and 31mm Nagler, the field is 0.8 deg^2 in area, a difference of 25%.
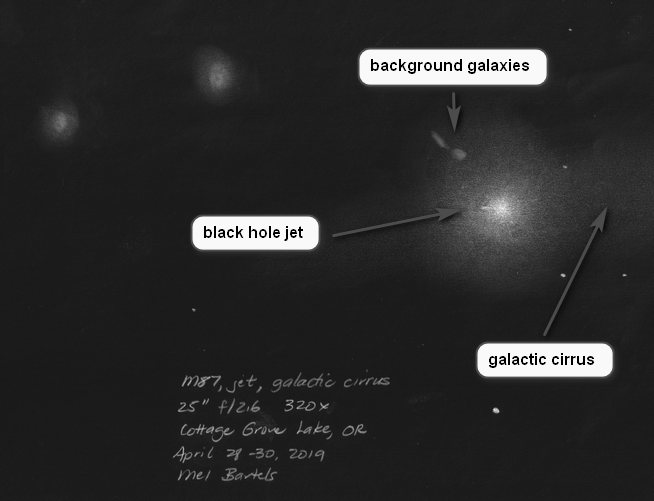
Etendue is the aperture area times the field of view area. The 25 inch [64cm] has a 1.1 degree field at lowest power, so its etendue in cm^2deg^2 = 32cm * 32cm * Pi * 0.55deg * 0.55deg * Pi = ~3100 cm^2deg^2. There is some vignetting at the edges of the field due to the minimal sized diagonal, consequently the vignetted etendue is closer to ~2500 cm^2deg^2. For more, see my Newtonian telescope designer. Thanks to high etendue, I'm able to see and sketch extremely faint nebulae such as Integrated Flux Nebulae. For more, see my Herschel's Ghosts article, my Richest Field Telescope article and my article on High Etendue Telescopes.
One eyepiece to rule them all
Considering the cost of eyepieces and that increasing magnification is best matched to increasing aperture, I've come to the idea of 'one eyepiece, several scopes'. A high end widest angle eyepiece is more expensive than many telescopes. I am better off with one eyepiece and a low power smaller scope coupled with a high power larger scope.
Here is a table of magnification and aperture for objects of different size. The aperture is based on a 7mm eye pupil. For 5mm eye pupil, increase magnification by 1.4 and decrease aperture by 1.4. Magnifications starred with an asterisk * may be limited by seeing conditions.
Eyepiece apparent field of view
60 degrees
80 degrees
100 degrees
Object size
arc-minutes
magni-
fication
aperture
inches
magni-
fication
aperture
inches
magni-
fication
aperture
inches
180
16x
5
22x
7
27x
8
60
48x
14
64x
18
80x
23
15
192x
54
255x*
71
319x*
89
4
717x*
200
956x*
266
1194x*
332
1
2866x*
796
3821x*
1062
4776x*
1327
My strategy is to select the highest magnification that frames the object in the eyepiece's field of view, then select my best fitting telescope.
Should I ever select for less aperture? That's equivalent to stopping down the aperture to improve the view. Stopping down by using an off-axis mask to reduce the deleterious effects of bad seeing helps. Stopping down to improve deep-sky views does not help. While objects can be detected at diminished apertures, there is a general loss of detail. See my results at Is aperture king?
As long as you can select for the largest aperture, you are in telescope mode (several scopes to choose from using one eyepiece to rule them all). Once aperture is constrained (you run out of it), you are in eyepiece mode (one telescope, many eyepieces).
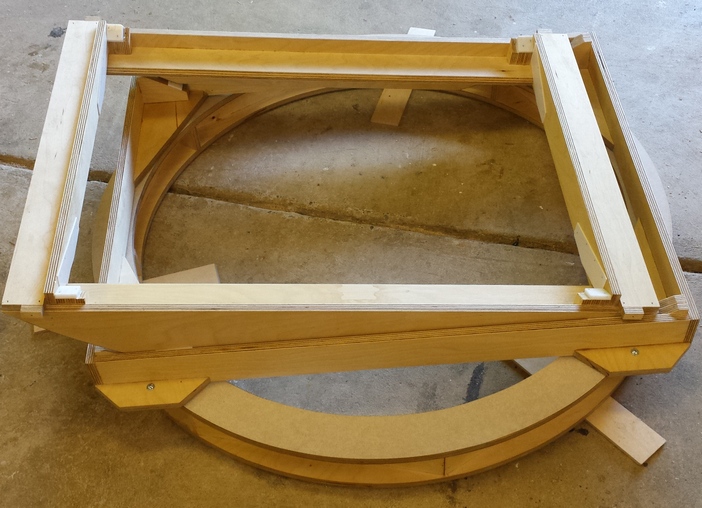
Folding altitude bearings
The altitude bearings need to be folded up against the mirror box for transport. The mirror box and folded altitude rims weight 50 pounds [23kg] and can be carried through narrow RV doors.
There are three ways to break apart the bearings:
Ensure that the bearing segments are at least 90 degrees in arc and slide solely on a single Teflon pad. See my TriDob.
Break the bearing with careful attention to how the bearing segments butt up when unfolded. See my ZipDob.
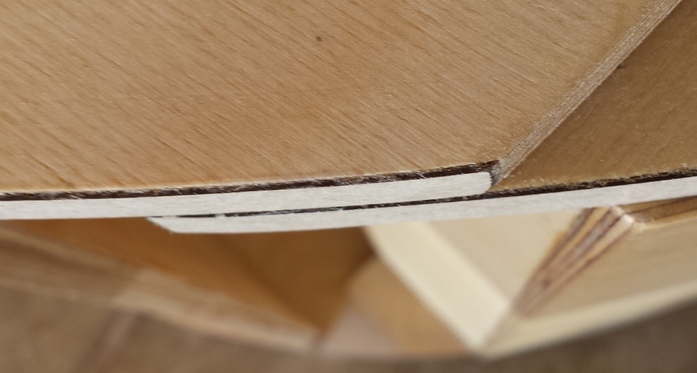
Place the bearings side by side with short tapers on each end so that one bearing fades away sliding on the Teflon pad while simultaneously the next bearing picks up the weight. This is the approach I chose for the 25 inch.
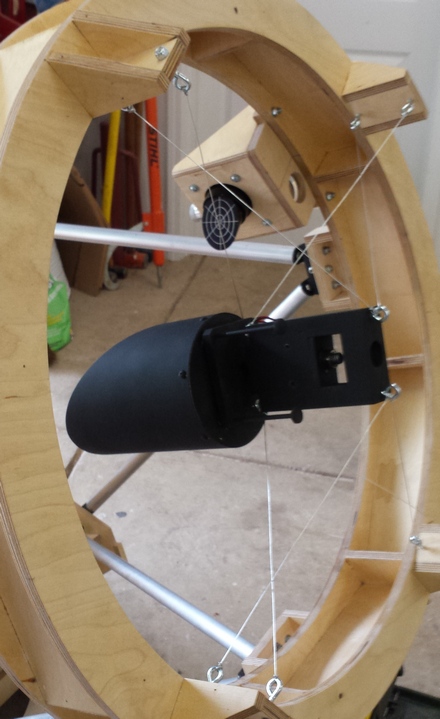
The wire spider
I use 19 gauge solid galvanized wire with a jig to hold the diagonal hub while wiring up. The wires hold collimation adequately from vertical to horizontal despite the diagonal and holder weighing 8 pounds [4kg]. The optical alignment has held up very well: I needed a quick tuneup on the diagonal holder after traveling on bumpy roads at the Oregon Star Party, otherwise I've not had to touch collimation.
Little-known optimizations
I optimize for light throughput with enhanced coatings on the primary mirror and diagonal and by minimizing obstruction. Interestingly, this means that the P2 coma corrector intrudes into the light path by a small amount. This allows me to save 2-3% of light (smaller diagonal + P2 coma corrector obstruction is less than the larger diagonal without any P2 coma corrector obstruction). The smaller diagonal also weighs a little less and cost a little less.
I also optimize for a tighter upper ring. The minimum sized diagonal already vignettes the light so it is not necessary to have an upper end that is inches larger than the primary. This saves several pounds of weight and makes for a slightly more compact size.
I optimized the mirror support empirically using the star test at high magnification. I've seen the deformation caused in a 12.5 inch full thickness mirror by a 3-point cell. My elaborated 9 ring support with 2-point edge support does better. Instead of triangles, eg, a total of 18 or 27 points, I use rings. I used PLOP, double integral calculus based on bending, Hubble equal area and hybrid models. For my comments in detail, go here.
Costs
$1500
coating
$ 750
diagonal
$ 600
tube assembly and base: wood, hardware, Formica et al
My retrospective on the 25 inch, a presentation for the 2020 Altaz Initiative conference https://www.youtube.com/watch?v=sc4Jl9MWXLc. My presentation starts at the five minute mark.